Tre Cime di Lavaredo Hike | A Guide to the Iconic Dolomites Peaks

By Roberto (Updated Nov 25)
⏱ 7 minutes
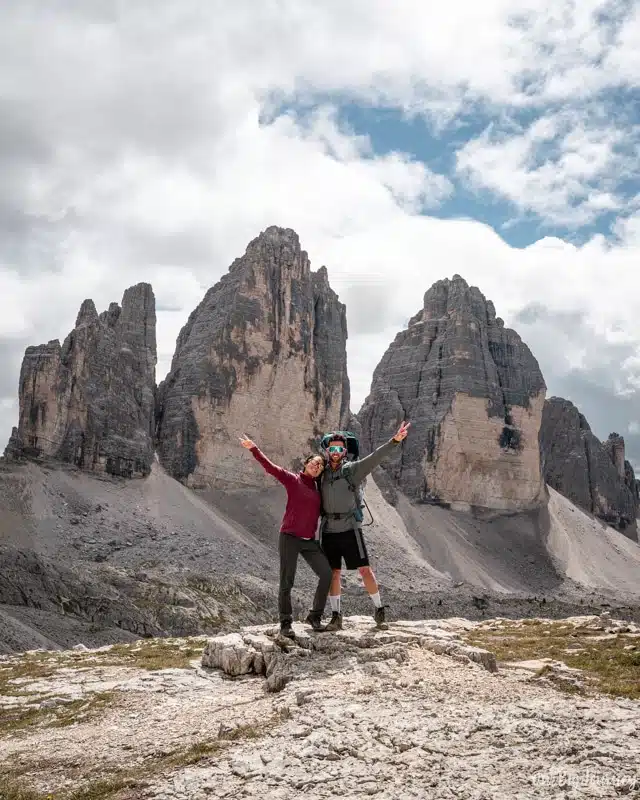
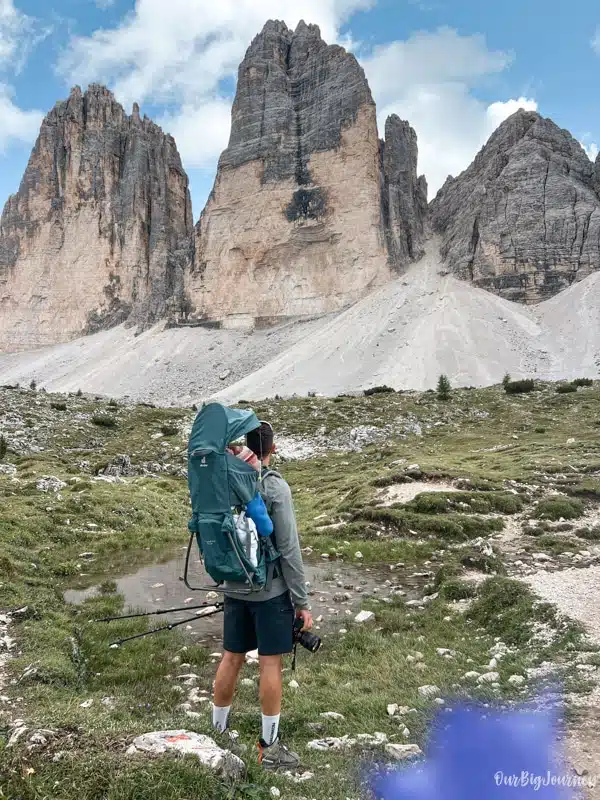
If there is a day hike that’s famous in the Dolomites, that’s the Tre Cime di Lavaredo hike. Tre Cime, with its three peaks, represents one of the iconic views of the Dolomites. We did the classic loop type hike with our baby Lara when she was 11 months, in the month of August. Let us tell you in this post all the info you need in case you want to walk around these massive rocks of pure dolomite!

Basic Hiking Info
Key Highlights about Tre Cime di Lavaredo Hike
- Distance: The classic loop type hike around Tre Cime, starting and finishing in Rifugio Auronzo, is around 10 kilometers.
- Difficulty: Medium. The hike is flat 60% of the time, but there are ups and downs in elevation gain, and it’s not an easy walk.
- Duration: can be around 4 hours, adding stops and breaks.
- Accessibility: Can be partially done with stroller, until the Rifugio Lavaredo.
- What to bring: hiking or good trail running shoes. Not sandals! (we saw a bit of everything). Also, the weather can be crazy here. We got sun, clouds, rain, hail and sun again, in a few hours. In the Dolomites bring always an extra layer and a rain jacket—always check the forecast before setting out! Bring cash
- Best time to go: Late June to early October for snow-free trails; September for fewer crowds.
- Photographers: to get “the photo” of the peaks, you have to pass the Rifugio Forcella, meaning you have to walk.
Our verdict about Tre Cime di Lavaredo
In our experience, Tre Cime is a good hike to spend a full morning (or the whole day, in case you add the Cadini Di Misurina hike, as we did). We recommend doing it for the changing path, for the 360 views of Tre Cime – a unique rock formation in the world, and to enjoy food in one of the rifugios (shelters) on the way.
About Tre Cime di Lavaredo Hike
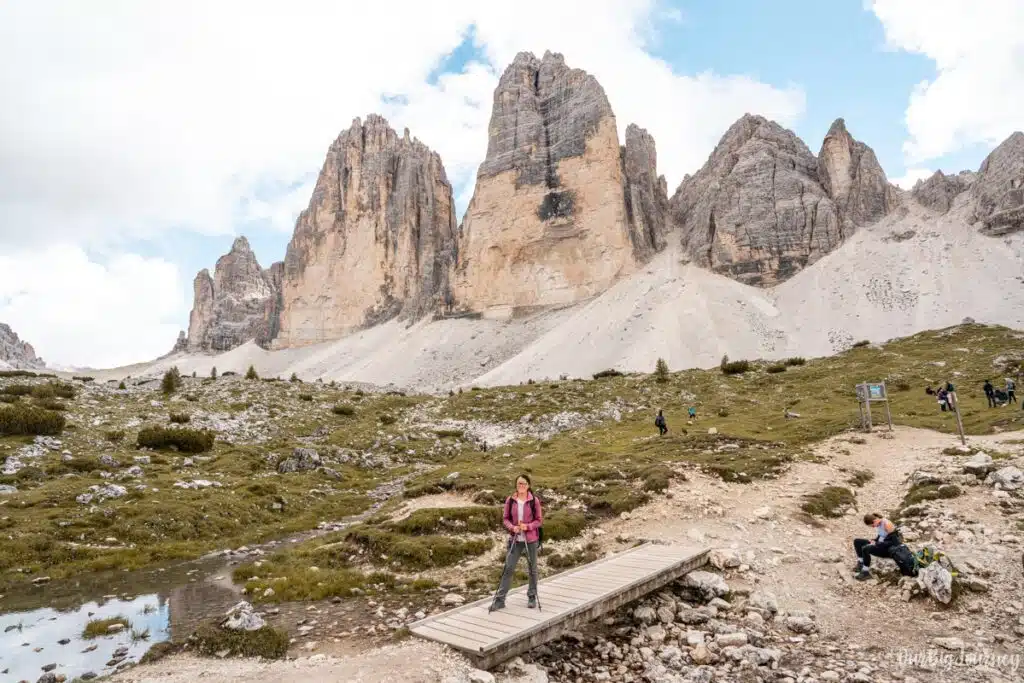
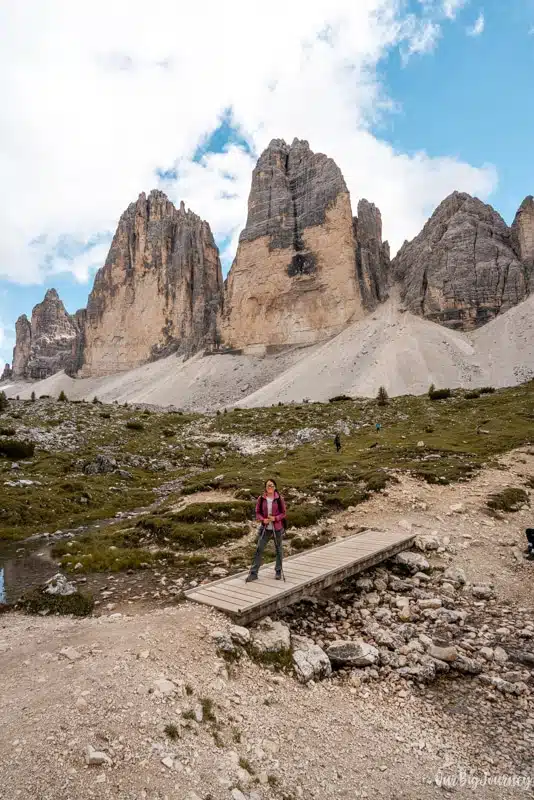
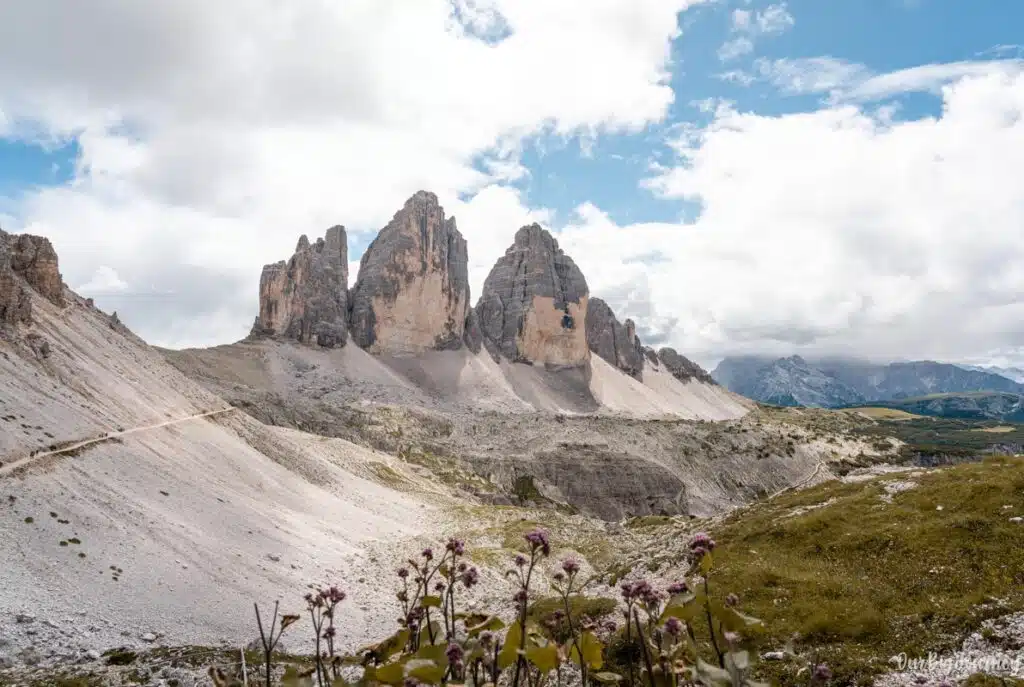
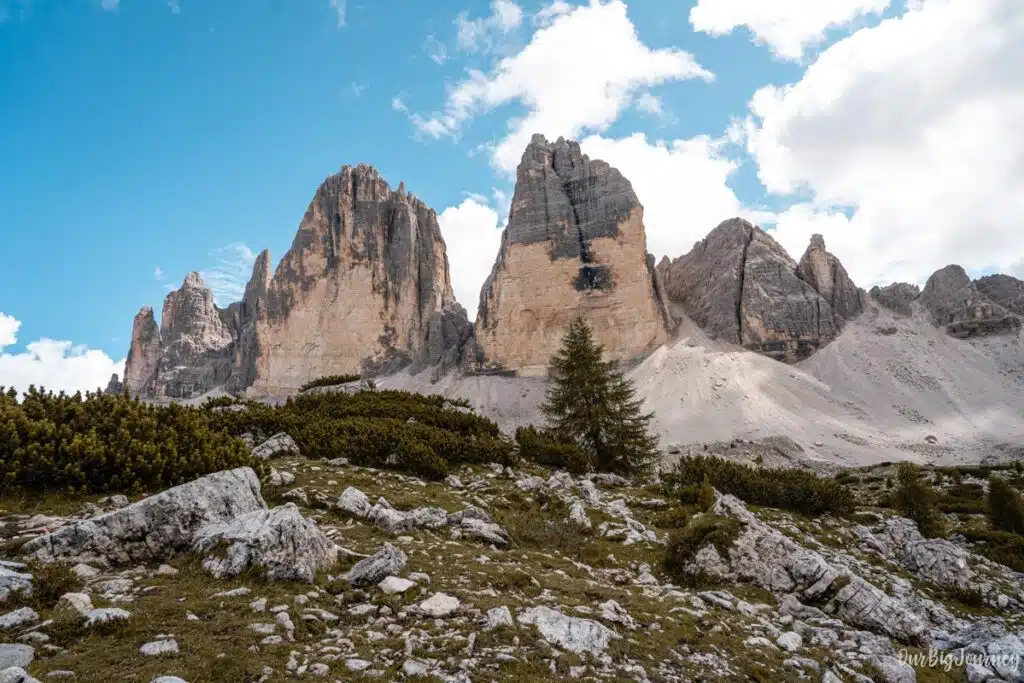
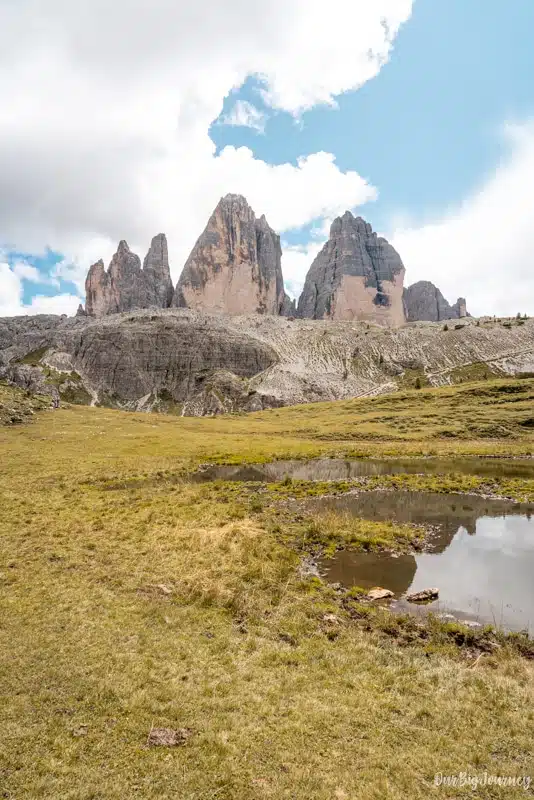
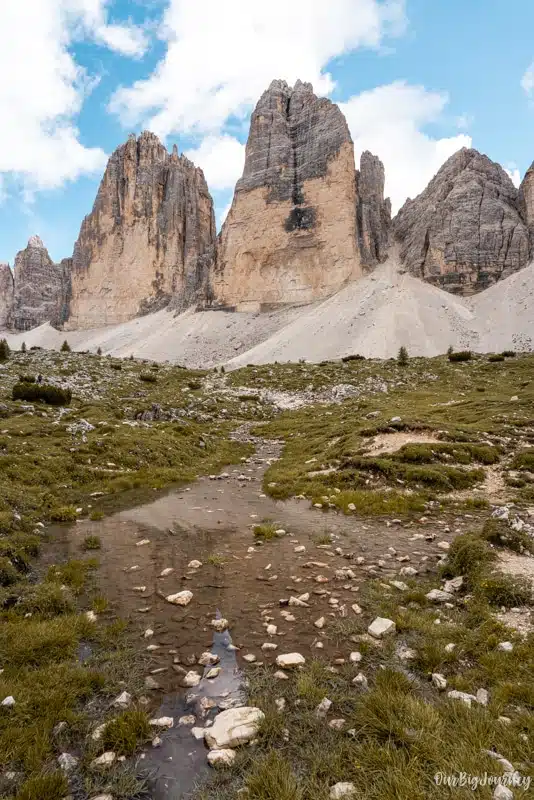
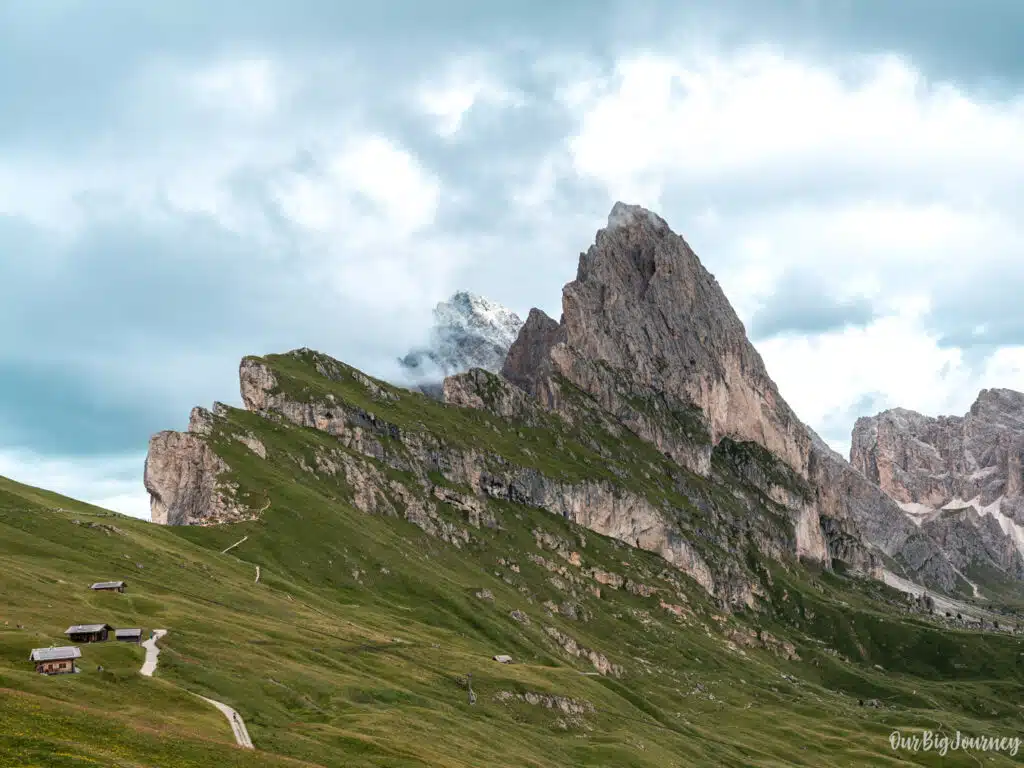
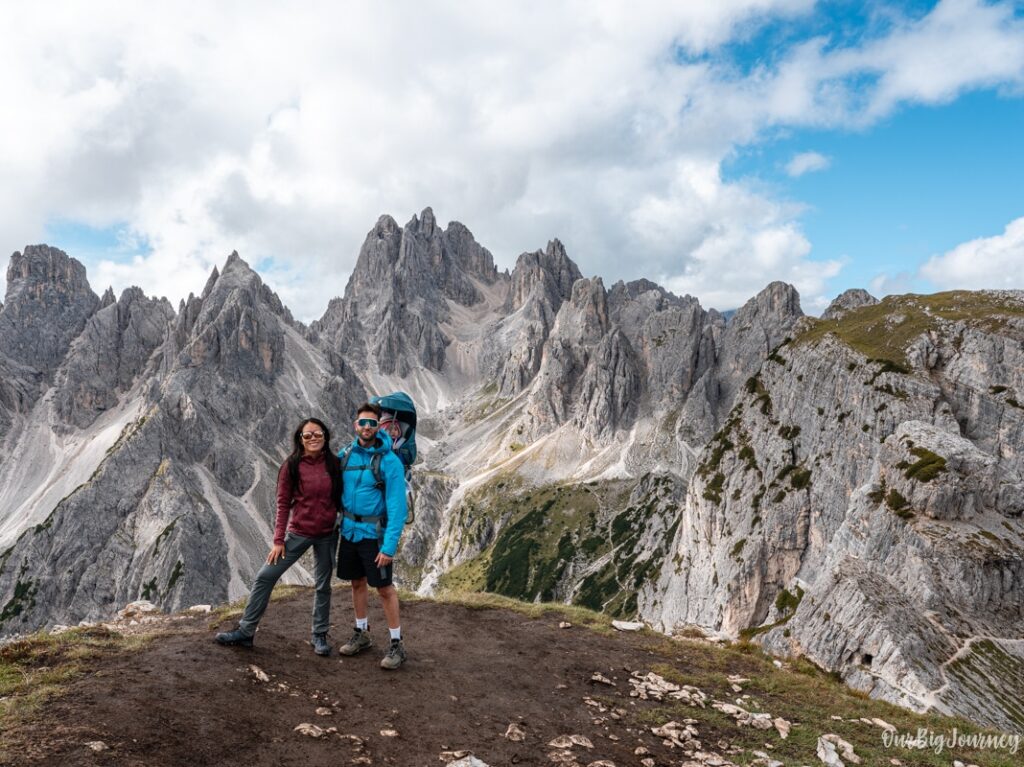
Few mountain landscapes in the world can rival the dramatic beauty of the Cime di Lavaredo in Italy. These three towering peaks—Cima Piccola, Cima Grande, and Cima Ovest—stand like monumental stone sentinels on the border between the Italian provinces of South Tyrol and Belluno. Rising to over 2,900 meters, their vertical walls and jagged silhouettes have made them one of the most photographed and hiked destinations in the Dolomites. The Cime di Lavaredo are a symbol of the Dolomites.

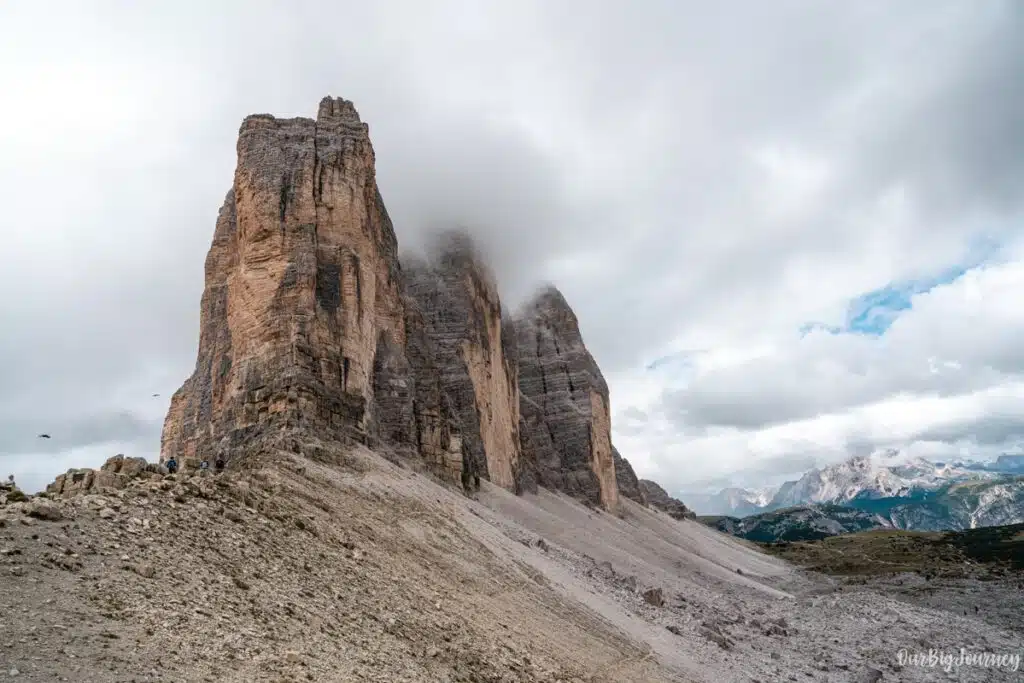
Beyond their beauty, they also hold historical significance—during World War I, the area was part of the front line between Italy and Austria-Hungary, and remnants of old fortifications and tunnels can still be found along the trails. They are also good spots for taking photos. Today, the peaks form part of the UNESCO World Heritage-listed Dolomites, attracting hikers, climbers, and photographers from across the globe.
Hiking Options for Tre Cime di Lavaredo
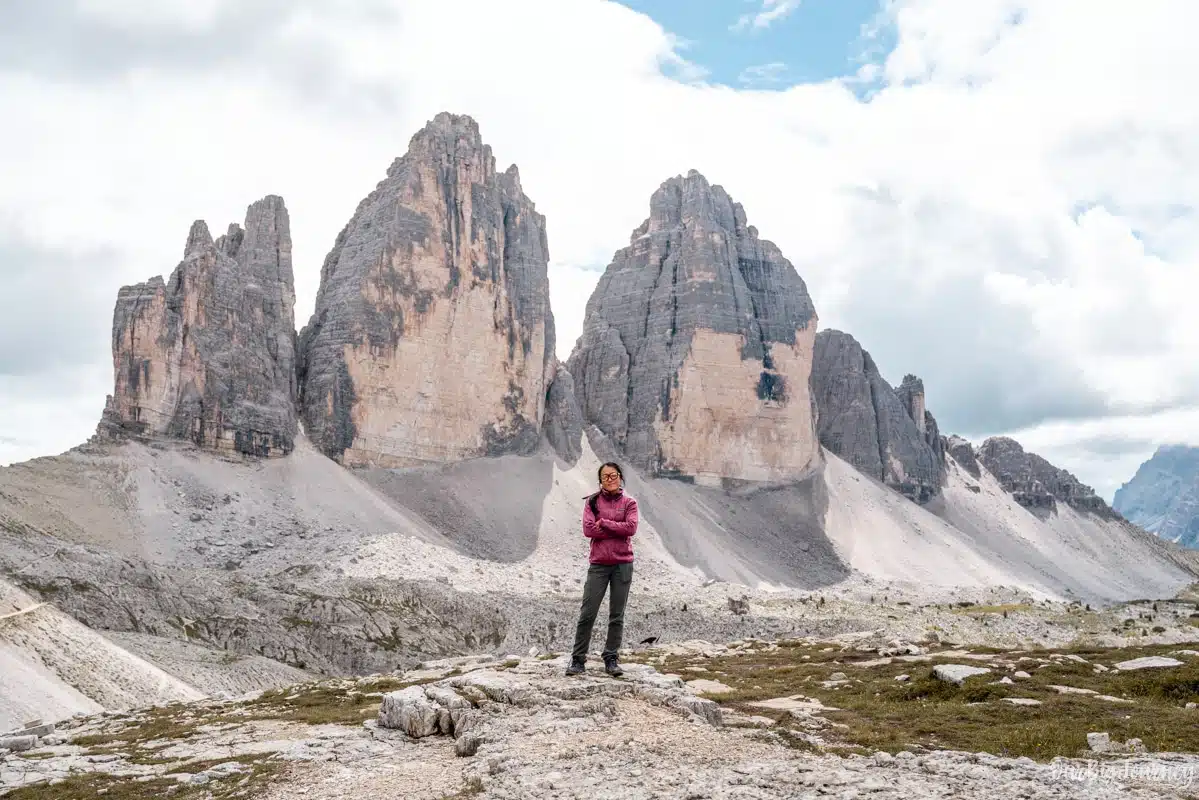
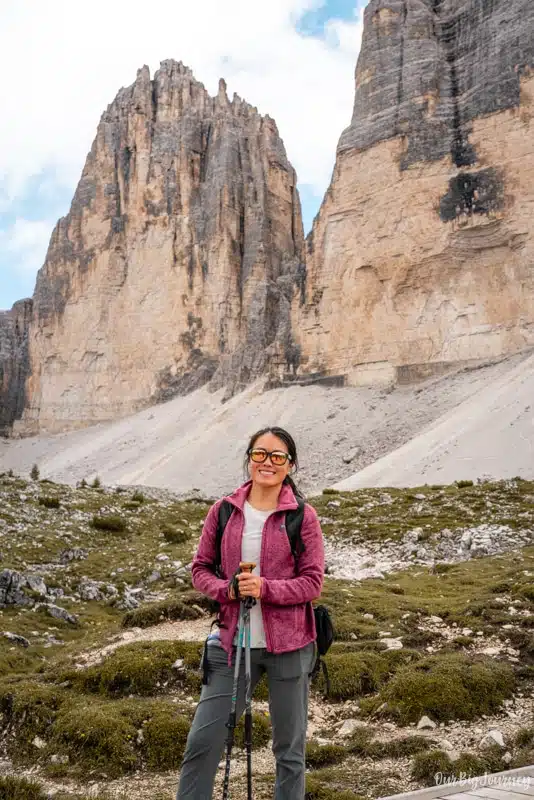
The most famous route is the Tre Cime di Lavaredo Loop, the 10-kilometer circuit that we did. Starting from Rifugio Auronzo, the trail offers panoramic views from every angle as you circle around the peaks. Along the way, you’ll pass Rifugio Lavaredo, Forcella Lavaredo (a high mountain pass with stunning views of the northern faces), and Rifugio Locatelli, where you can enjoy one of the most iconic photo spots in the Dolomites.

For those seeking more adventure, there are extensions to the loop, like:
- Cadini Di Misurina: adding 60-90 minutes and spectacular views. We talk more about this in the next post.
- Laghi dei Piani & World War I tunnels: add 30-60 minutes extra time.
- Vias Ferratas: in case you prefer more technical adventures, we found this blog super informative.
If you’re short on time, prefer a lighter walk or want to go with a stroller, you can simply hike from Rifugio Auronzo to Rifugio Lavaredo and back—still an unforgettable experience and you will get some great views.
Getting To Tre Cime di Lavaredo
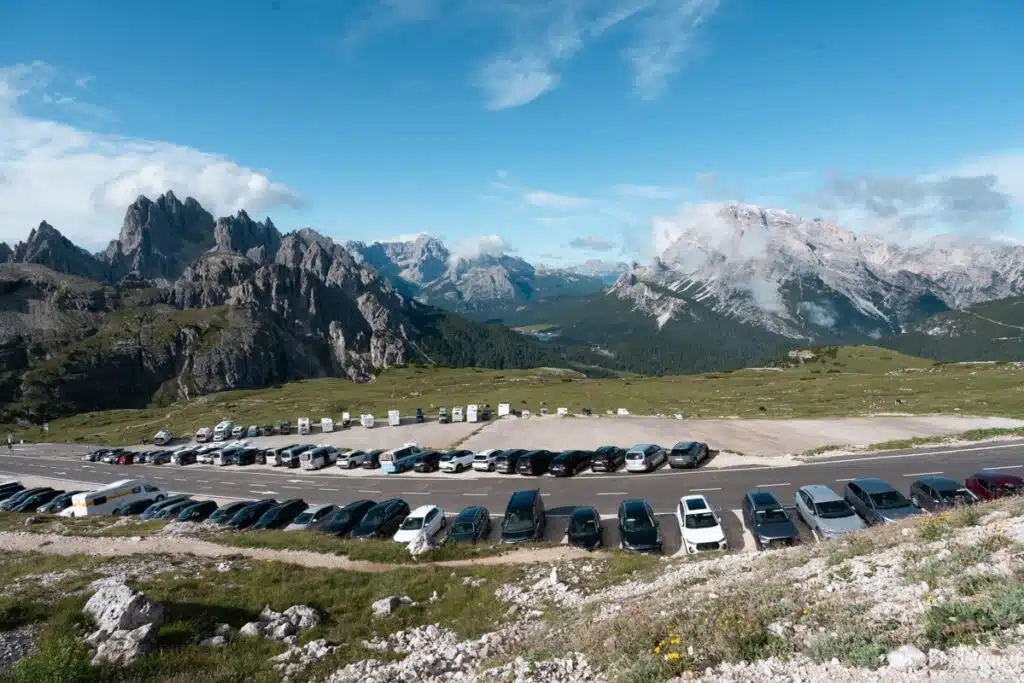
🚘 By car or van. The most common starting point is the parking of Rifugio Auronzo, accessible by an EXPENSIVE 40€ 7 km toll road from Misurina during the summer months (usually June to late September). The road is open to cars, motorbikes, and shuttle buses, with parking available right by the rifugio. Important note: From Summer 2025, there is a limited amount of spots and you have to buy the reservation online.
🚌 By bus. If you don’t have a car, regular buses run from Cortina d’Ampezzo or Dobbiaco/Toblach to Misurina, where you can connect to a shuttle.

🚶🏽 By foot. In case you don’t want to pay the parking or outside of summer, when the toll road may be closed due to snow, you can still reach the area. But they way in and out adds more than 10 km…
The Hiking Experience
In case you’re really curious about Tre Cime di Lavaredo hike experience, we like to write about our own experience in certain hikes. Read below!
Part 1. Cadini Di Misurina hike extension.
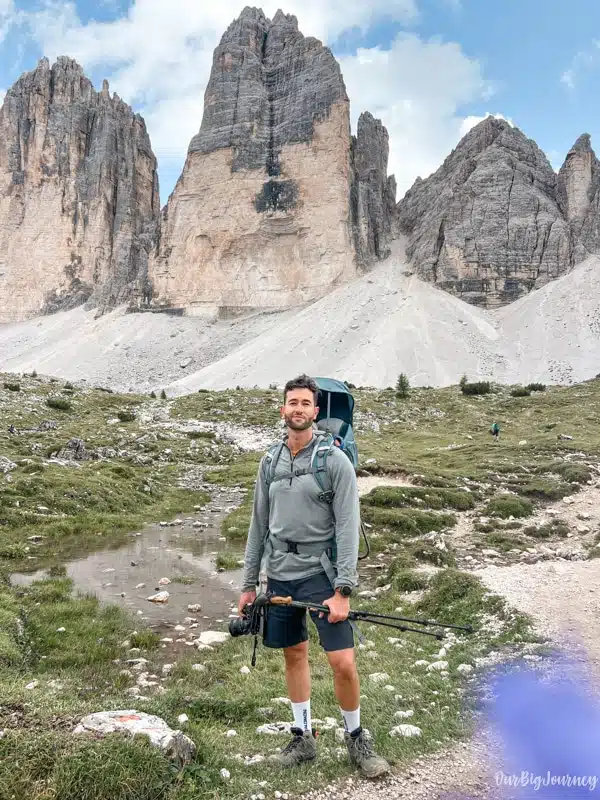
We started our adventure from Parking Auronzo. We brought water, some snacks and our baby Lara. We went in the beginning of August and there were people but I wouldn’t say the place was packed. Maybe the regulation of the expensive parking is helping a bit.
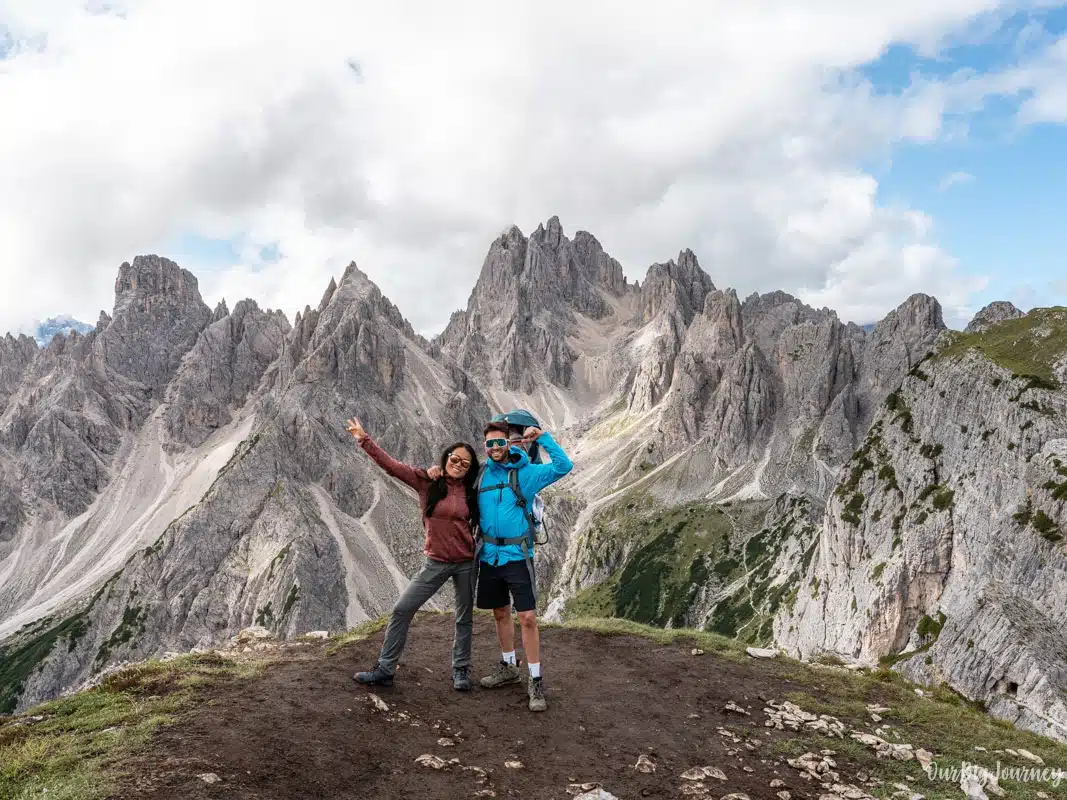
We followed the path to the peaks of Cadini Di Misurina. There is only one direction and the path is quite straightforward. We share more detail about this hike in the post Cadini di Misurina Hike. Anyways, it took us less than 90 minutes in and out plus stoppping for photos. Note that we didn’t do the silly line for the main photo stop that many people do.
After enjoying the epic views, we went back, this time reaching Rifugio Auronzo where we had a coffee, a snack and fed Lara.

Part 2. From Rifugio Auronzo to Rifugio Lavaredo.
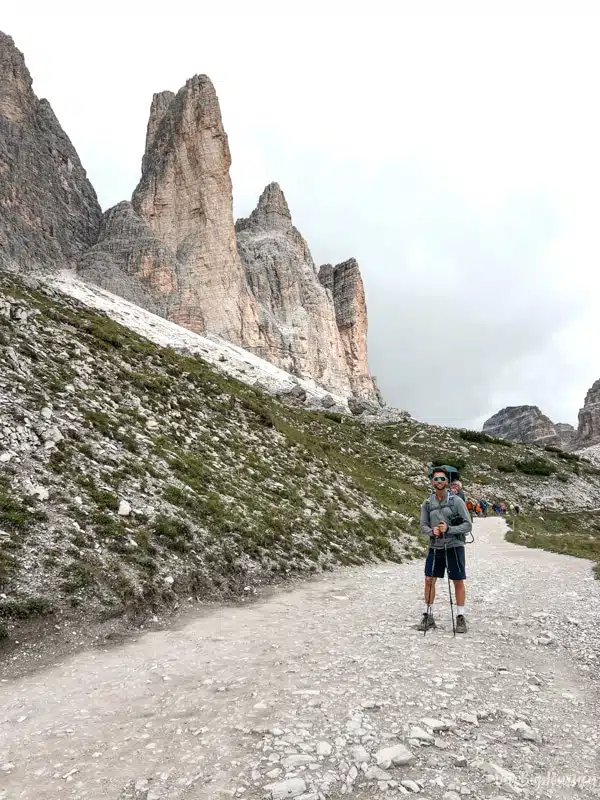
After a break, we left Rifugio Auronzo, following a gentle trail with wide gravel paths leading to Rifugio Lavaredo. This is the easiest part of the hike and can be done with a stroller. Here, you’ll already be treated to spectacular views of the peaks and surrounding valleys, but you won’t see the “typical” photo of Tre Cime from here. That comes later. The path then climbs gradually to Rifugio Lavaredo were you can stop (we didn’t) or walk around a bit higher, to take photos.
Part 3. Lunch break at Rifugio Locatelli
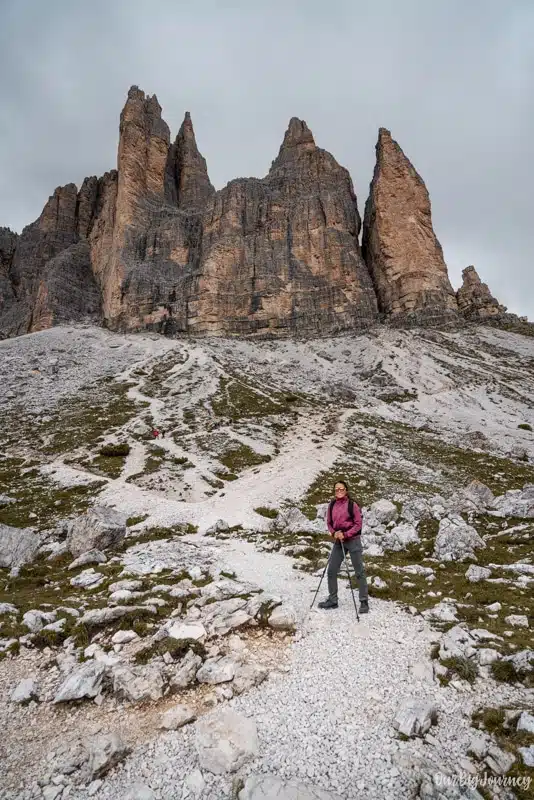
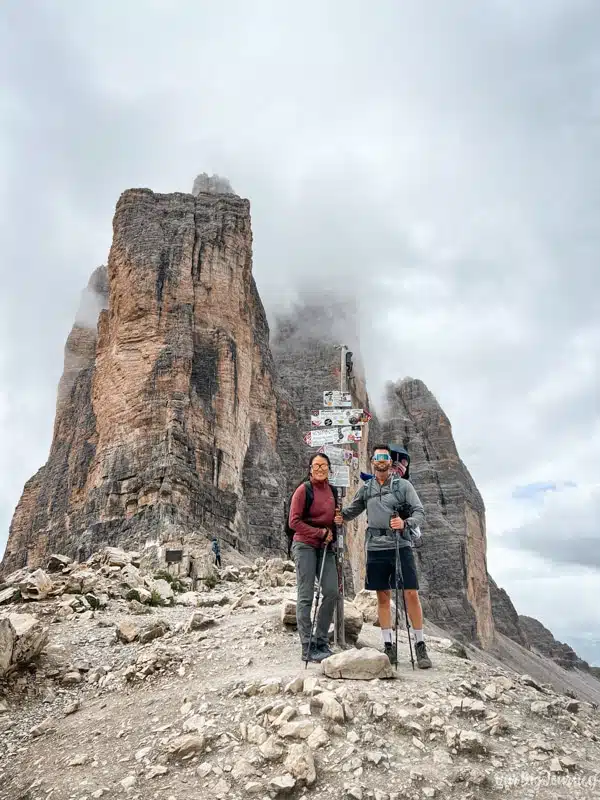
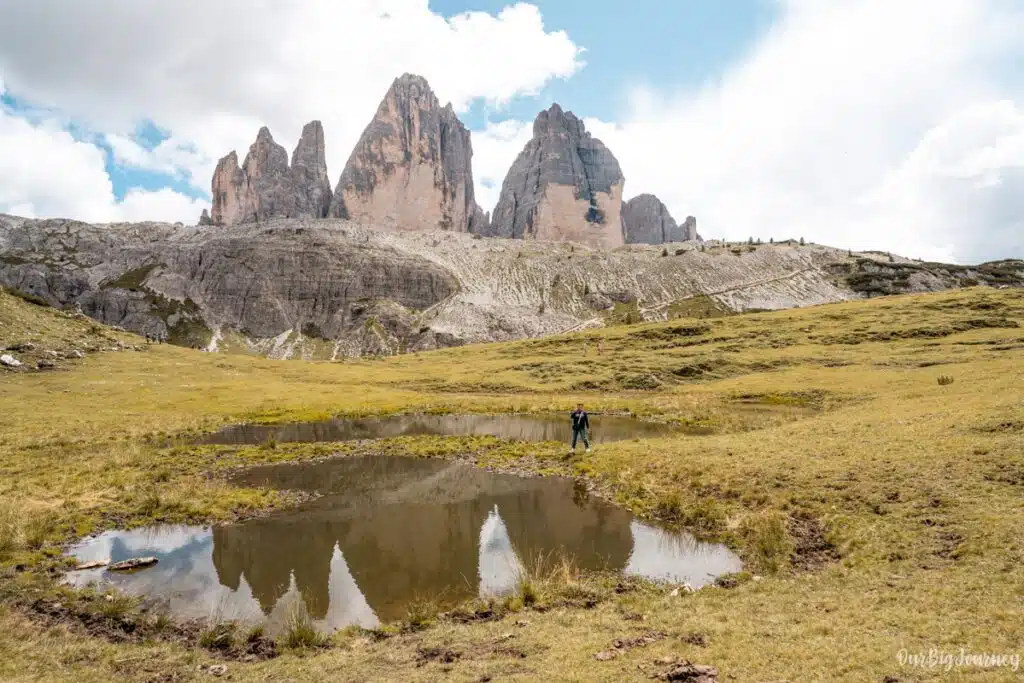
We decided to move faster to reach Rifugio Locatelli because it seemed like it was going to rain hard. Despite the sun the morning, weather can change A LOT in the Dolomites. Rifugio Locatelli is more or less in the middle of Tre Cime loop hike and the views from there are amongst the best of the hike.
After 20 minutes from passing Rifugio Lavaredo below us, the rain started to fall hard even with small bits of hail. We went running until Rifugio Locatelli because we were worried about Lara getting cold or wet. This left my legs without energy but we made it to the hut. But there were two problems now… The rifugio was packed, so packed, and they didn’t take credit card and we had no cash.
Luckily, a guy with a family saw us with Lara and our worried and sad faces, and told us he could lend us some money and we could send him a transfer later. Thanks Cristiano if you’re reading this! You saved our day! After waiting in line for 15 minutes, we had lunch with Lara (who was sleeping the whole time) and waited in the warm rifugio until the rain left and the sun came back.
The views from this rifugio are really good, facing the famous north faces of Tre Cime. Laghi dei Piani is also close to this place, which makes Rifugio Locatelli a really convenient place for a stop. Keep in mind that they don’t take card and the toilet is 1€.
Part 4. From Rifugio Locatelli to Parking Auronzo.
The return to the parking takes you through rolling alpine pastures, where marmots can sometimes be spotted sunbathing on rocks. We didn’t see any. Along the way, the changing angles of the peaks make it hard to put your camera away and the path turns green compared to the rocky terrain of the first part of the hike.
The path to the starting point of the hike to complete the loop, goes down, up and flat. In this order. Once you’ve done the going up part, you’ll reach Rifugio Angelo Bosi al Monte Piana, the last rifugio in the loop. From here, it is just a couple kilometres to the parking, and that’s it!
Hiking the Cime di Lavaredo isn’t just a walk through the mountains—it’s an immersion in one of the most spectacular landscapes in Europe. Whether you complete the full loop or simply gaze up at the peaks from a nearby rifugio, you’ll understand why this corner of the Dolomites leaves such a lasting impression on all who visit.
Explore many more hikes to do in the Dolomites!


Pingback: Cadini di Misurina Hike | An epic lookout - OurBigJourney - Travel and Photography Blog
Pingback: Lago di Braies Honest Review: Is It Worth Visiting? - OurBigJourney - Travel and Photography Blog